
 |
By Maureen Albertson |

We are doing a breakdown of the 103C as a sample to help with re-assembly of these reels.
- Quick jump to specific parts:
- Bail Spring
- Cam Lever
- Eccentric (Anti-Reverse)
- Clicker
- Drag Washers
- Gear, Main Gear and Shaft
- Gear, Pinion
Or just start reading from here:
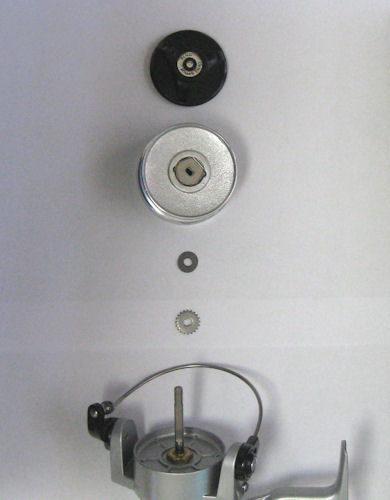
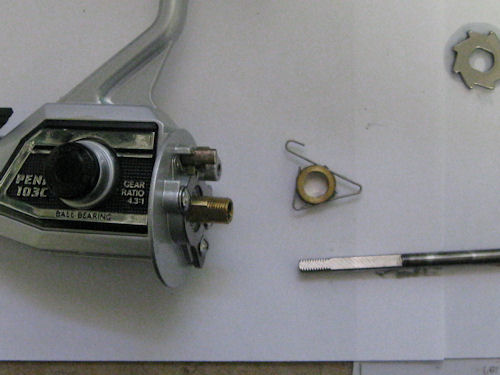
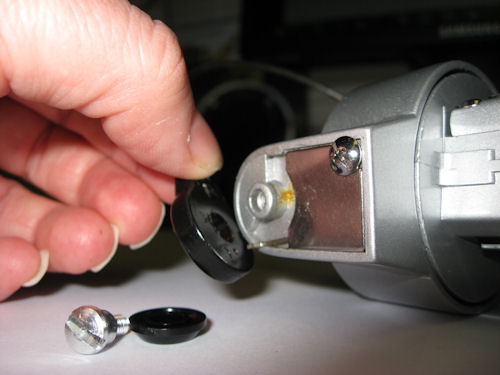
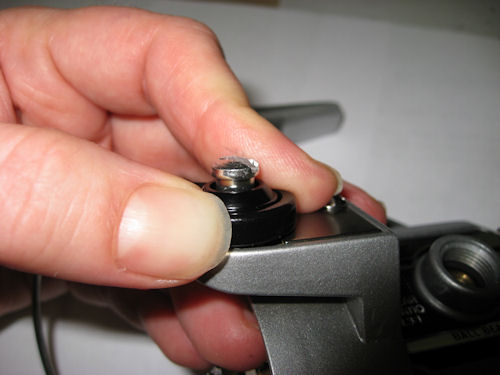
Start by removing the drag knob, spool and housing cover. Note the order of the thrust washer (60-103) and the click ratchet ( 40B-103).
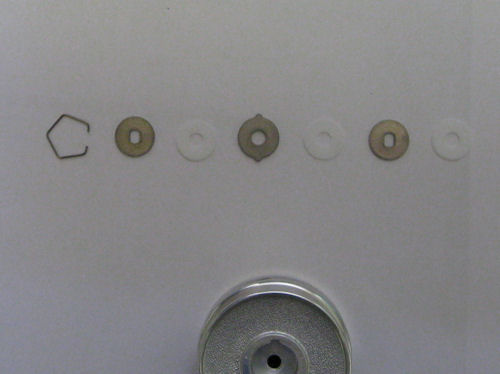
Take out the drags by popping the spring with the end of a screw driver at the open end of the spring. Keep fingers in place to keep the spring from launching across the room! Photo shows them laid out in the proper order.
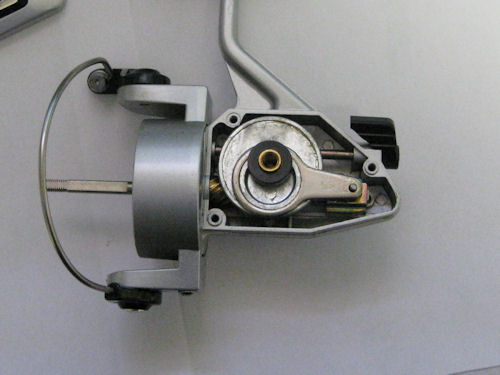
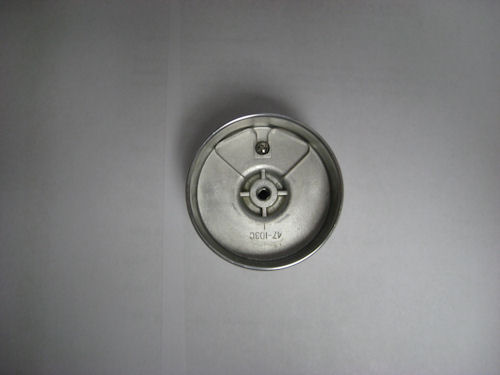
Remove the housing cover to access the main gear (8-103C) and crosswind shaft shaft (39-103C).
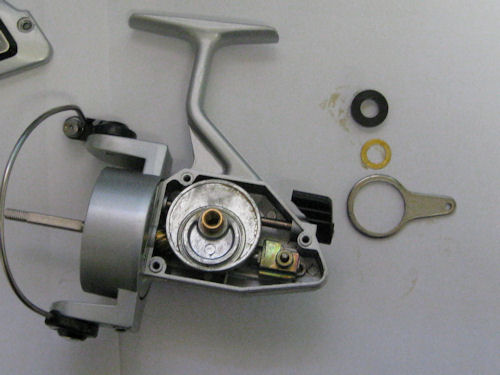
Remove the bushing (2A-103), shim (8A-103) and crosswind arm (43_103C) from on top of the main gear and set aside. One of the differences from other Penn spinning reels that you will note in this reel is that the crosswind shaft is moved by the arm on the main gear, rather than the main gear turning a crosswind gear.
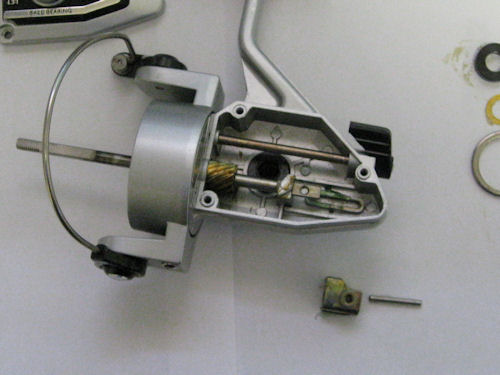
Remove the crosswind arm pin (44-103C) pin and slide the shaft out of the block to remove the block (43-130C). Remove the rotor cup nut (38-103) and the rotor (27-103C).
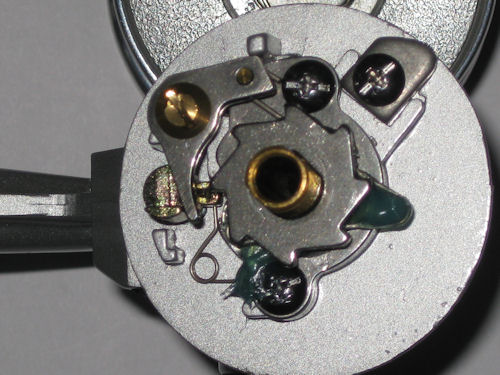
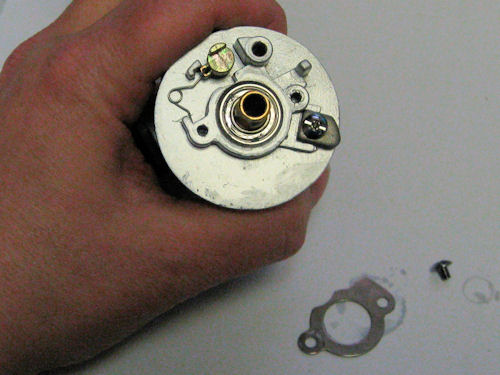
Photo showing the inner workings underneath the rotor. Note the cam in the upper right of this photo.
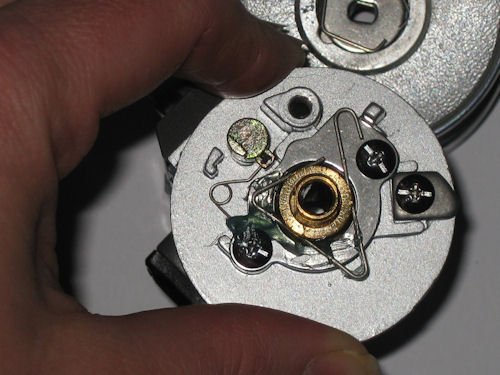
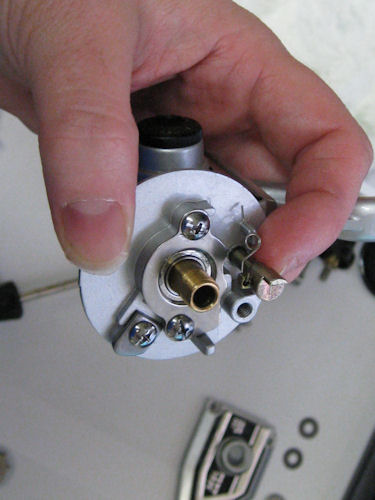
Remove the click ratchet (10-103C) and the dog (4-103C) including it's mounting screw (3-103) and now you can see the position of the springs more clearly. The pin on the dog sits in the u-shaped hook of the silent dog spring (230-103C) .
Quick photo of silent dog spring (230-103C) wrapped around the grove in the pinion gear spacer (19A-103C)
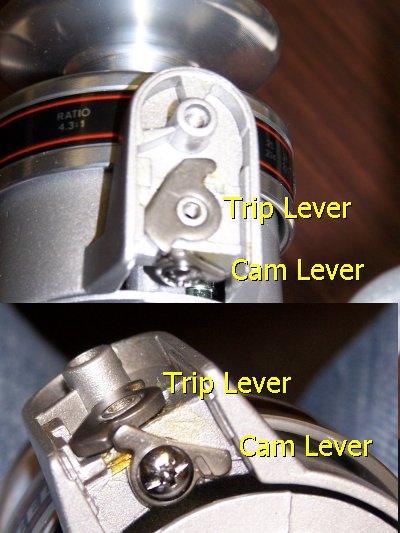
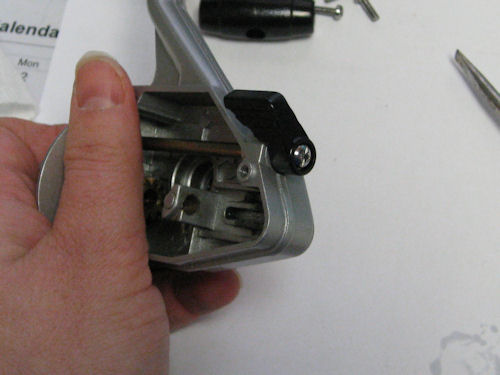
The trip lever/cam lever are what work together to flip the bail back into position from open to closed when you turn the handle. If they are incorrectly installed, the bail will not flip back.
Below is a photo of a 103C from two angles for reference, showing the positioning of the trip lever and the cam lever. This positioning may be different on other Penn reel series, but this gives you the general idea of placement. See SS cam installation for another example.
It's a bit hard to see, because the spring is so fine and is underneath the cam lever, that the spring is positioned with the long end sitting in that grove in the rotor beneath it (you can just about see the long end of the spring against the greased groove in the photo), with the small hook on the spring set around into the small groove on the cam lever itself. This can be very hard to put into place (I took it apart to see how it was positioned and it took me 10 minutes of fumbling to put it back, when doing it for the first time).
Remove the bearing cover (21-103C) to access the bearing (20-103) and the pinion gear (19-103C)
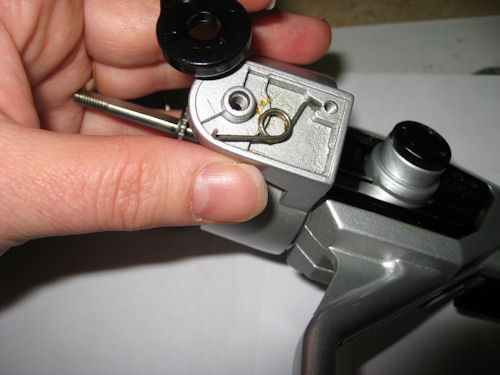
The hooked end of the eccentric spring (6D-103) goes into the hole on the eccentric (6A-103)
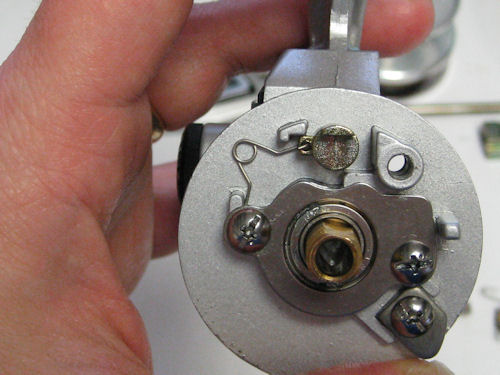
Then the long end of the spring tucks into the bend where one of the bearing cover screws (23-103) sits and the projecting tip on the eccentric is tucked against the post on the housing.
When the eccentric is in the position as shown in the previous photo, then the eccentric lever (6E-103) should be installed in this position with the screw (6F-101)
Positioning of the clicker. The washer is installed under the click tongue.
Remove the bail wire to work on the bail spring. You can remove just that side if wished or remove it completely to have it out of the way. The bail spring shown here with the cover still on and the bent end of the spring sticking out.
This is the positioning of the 32-103 bail spring underneath the 227-103 bail spring cover

Putting the wire back on. Flat side of the paddle down towards the spring. Hook the bent end of the spring into the small hole on the paddle. Push gently but firmly into position over the screw hole.
Holding the paddle firmly in place, put the 34A-103 bail arm spacer and the 31A-103 bail arm screw back on and tighten.
Order parts online for this reel(s):
https://www.mysticparts.com/PennParts/Spinning.aspx#Silver
0 Comments